How to Add LUTs in CapCut | Step-by-Step Color Grading Guide
Learn how to add LUTs in CapCut step by step to enhance video colors and create cinematic effects easily. Improve editing quality fast for beginners.
Video quality is significant in capturing the attention of the audience, particularly in the current age of short-form content whereby users scroll at a high rate. Also, a well-shot video may seem flat or amateurish in case the colors are not adjusted accordingly.
This is where LUTs come in. The LUTs in CapCut can be used to immediately change the visual style of your video in CapCut by enhancing the color tones, contrast and the overall mood of your video. You need a cinematic look, a warm travel vibe, or a dramatic feel, you can completely change the feel of your content within a few seconds using LUTs.
In this guide, you will learn to add LUTs in CapCut step-by-step, practical tips, types of LUTs, and common pitfalls to avoid.
What Are LUTs in CapCut?
LUT is an abbreviation of Lookup Table, which simply is a preset of color grading that is used in video editing.
To put it simply, LUTs are professional and more accurate in their work and are similar to advanced filters. A LUT is applied, and you can sit back and watch the entire color style of your video automated.
For example:
- A dull video can become cinematic instantly
- A normal vlog can look like a movie scene
- Travel footage can get warm and aesthetic tones
CapCut supports the use of LUTs (particularly in CapCut Pro versions) to enable creators to accomplish professional editing without sophisticated tools.
Why Use LUTs in CapCut?
Content creators, YouTubers, and video editors find LUTs valuable since they can save time and enhance the quality.
Here are the main benefits:
- Instant cinematic video look
- Better color balance and tone
- Faster editing process
- Perfect for social media content
- Professional-quality output without advanced skills
LUTs are also a strong tool in case you want your videos to be outstanding on such platforms as Tik Tok, Instagram Reels, or YouTube Shorts.
Types of LUTs You Can Use in CapCut
Before applying LUTs, it’s important to understand different styles:
Cinematic LUTs
Used for movie-like visuals with strong contrast and dramatic tones.
Warm LUTs
Perfect for travel vlogs, golden sunlight, and lifestyle content.
Moody LUTs
Dark, emotional, and high-contrast style for storytelling videos.
Travel LUTs
Bright, vibrant colors ideal for outdoor and adventure clips.
Vintage LUTs
Retro film-like effect for nostalgic content. Each LUT creates a different mood, so choosing the right one depends on your video style.
Explore more here: Fix Mod APK Errors of capcut pro
Step-by-Step: How to Add LUTs in CapCut
Step 1: Start a New Project
Open the CapCut app and tap on “New Project.” Select the video clip you want to edit and import it into the timeline.
Step 2: Open Editing Tools
Once your video is added, tap on the clip in the timeline. At the bottom menu, you will see different editing options.
Step 3: Go to Adjust Settings
Scroll and tap on the “Adjust” option. This section contains all color correction tools like brightness, contrast, saturation, and LUT settings.
Step 4: Apply LUT Effect
Inside the adjustment panel, look for LUT or Color Presets (availability depends on CapCut version). Select a LUT from the list and tap on it to apply. Your video colors will immediately change based on the selected style.
Step 5: Adjust Intensity
After applying the LUT, you will see an intensity or strength slider.
You can control how strong the effect looks:
- Low intensity = natural look
- Medium intensity = balanced cinematic look
- High intensity = dramatic effect
Step 6: Preview and Export
Play your video to check the final result.
If everything looks good, export your video in high quality and share it on your preferred platform.
Pro Tips for Better LUT Editing
To make your videos look more professional, follow these tips:
- Don’t overuse LUT strength (avoid unnatural colors)
- Adjust exposure before applying LUT
- Match LUT style with video lighting
- Use soft intensity for realistic results
- Test multiple LUTs before final export
These small adjustments can make a big difference in your final output.
Common Mistakes to Avoid
Many beginners make these mistakes while using LUTs:
- Using the wrong LUT for lighting conditions
- Over-saturating colors
- Ignoring preview before export
- Applying multiple LUTs at once
- Exporting in low resolution
Avoiding these mistakes will keep your videos clean and professional.
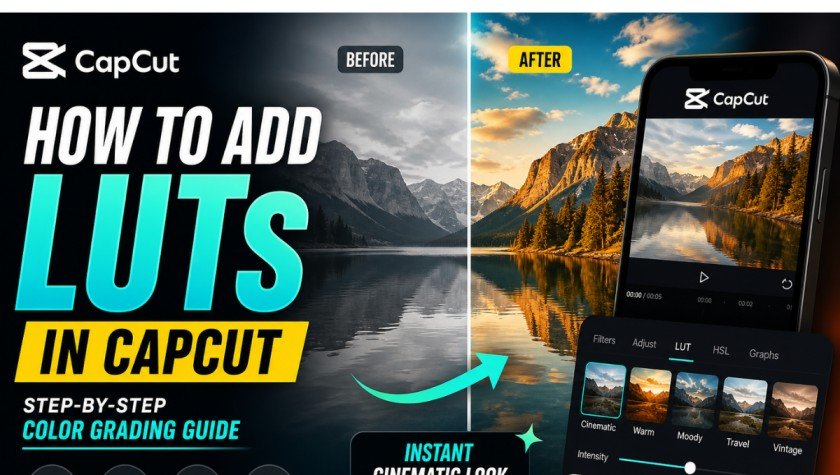
Before vs After LUT Effect
LUTs can completely transform your video:
- Before: Flat, dull, and unbalanced colors
- After: Cinematic, vibrant, and visually appealing look
This transformation is the main reason LUTs are so popular among editors.
Conclusion
One of the simplest methods of improving your video editing game is by using LUTs in CapCut. They assist you in turning ordinary clips into movie, professional-looking videos without having to possess higher skills in editing.
The above steps will enable you to easily apply LUTs, modify their intensity and create visually spectacular videos that will attract more viewers and engagement. To become an outstanding user of social media, you should have LUTs as a mandatory skill of content creation established in the modern world.